DIY INSTRUCTIONS
| RESTRINGING AN ACTION MAN HEAD DIY INSTRUCTIONS |
Restringing an Action Man head is a little fiddly but
fairly straight-forward and is something you can easily do yourself.
Below are instructions showing you how we do it, developed from trial and
error. You will need:-
|
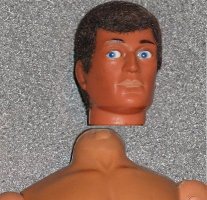 |
With some hot (not boiling) water in a small container, dip the base of the Action Man head into the hot water for about 30 seconds depending on the temperature of the water. Try to avoid getting his hair wet in case you damage it. | 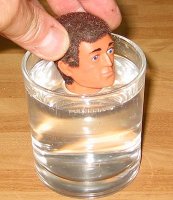 |
| Once the bottom of the head is hot you
will find it is soft and flexible and what you need to do is remove the
plastic cone that sits inside the head, it is held by a ridge on the
bottom of the head.
Working fairly quickly before the head cools down, insert the rounded end of the small spoon between the outer layer of the neck and the internal cone. |
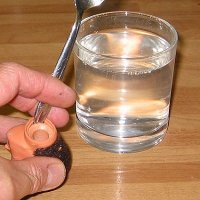 |
| Slightly levering upwards as you go, slide the spoon end around the edge of the neck between the two layers and you will find that the internal cone will pop out of the head. If you find the plastic is cooling down and getting stiff then stop and re-heat it as before. | 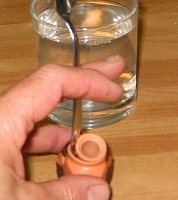 |
| You should now have an action man head and a separate plastic cone. There may be a small disc of rubbery material in the top of the cone, this is the remains of the original fixing and can be discarded. | 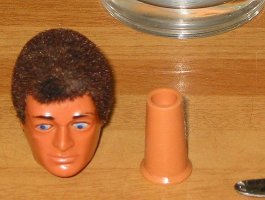 |
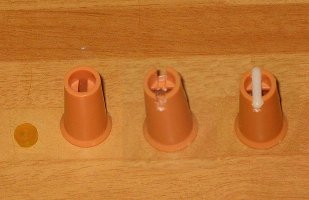
| The picture here shows from left to
right, the small rubber disk removed from the cone and then the
cone. You will notice the cone has a slotted surface just below the
top. With a small (junior?) hacksaw you need to cut two slots
from the top of the cone down to the surface at right angles to the
original slot (shown third from the left) such that when the small side
pieces in the slots are removed (bend them outwards, they usually break
off - if not you may need to cut them off with a sharp long-pointed craft
knife) then your pin (Q-tip shaft or similar) is a tight fit inside the
grooves you have just cut. You need to ensure that the pin does NOT
protrude outside of the cone surface as it will jam the eyes.
Susan Hambly contacted me after following these instructions. Instead of messing around cutting the top of the cone she found a small button with a shank that fitted inside the top of the cone to hold the elastic (see later) - a much better idea if you can find one. Reg in Madrid, Spain also contacted me and said that instead of cutting slots to locate the pin on the top he set it into the recess in the cone, tied the elastic (see later) round it and then to both stop the peg from moving and to stop the knot from undoing, he filled the recess with glue from a heat gun. Another good idea if you have a glue gun. |
 |
| Now for the fiddly bits. If you look inside the action man's neck you will see a plastic pin running from front to back, around which sat the hole in the original rubber fixing (shown inset, the other end from the hole sat in the top of the cup). You will most likely find part of the old rubbery fitting in there, you need to carefully break it up (hold the body upside down) and remove it (it should be rubbery but when old can be like hard brittle plasticine). Try not to let any bits fall into the body as they will rattle - many an hour can be spent with little lights and hooks staring upwards into an upturned body trying to fish them out - a real pain-in-the-neck. | 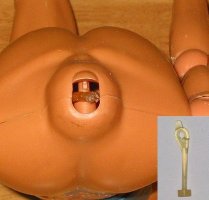 |
| The next fiddly bit involves threading the 2mm elastic into one side of the neck, and back out again after going around the plastic pin. First we make a small hook (it should just fit around the elastic) on the end of the wire and then put a much larger curved bend in the wire just behind the small hook and at right angles to it. The idea is to feed the elastic in on one side of the plastic pin and then feed the hook into the other side and then (using the large radius bend) feed the little hook underneath the plastic pin, hook onto the free end of elastic inside the body and pull it back out of the body (so it is caught around the plastic pin) OR tied to the small button suggested by Susan Hambly. | 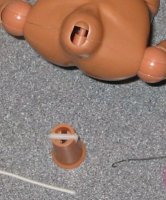 |
| We now feed the two ends of the elastic (with the body hanging on by the plastic pin) through the little cone (larger end first) up and through the original slot in the top of the cone and then place your plastic pin into the slots you have previously cut in the cone so that it is BETWEEN the two pieces of elastic. Or feed the elastic through the small button shank suggested by Susan Hambly. | 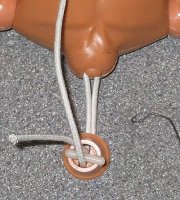 |
| Now, if you tie a knot in the two elastic ends it will pull the little cone down onto the neck of the body. Tighten the knot as tightly as you can and then tie a second knot on top of the first. This should not come loose but to make sure we add a little drop of super-glue onto the knot - this ensures it never loosens. We also put a couple of small drops on the ends of the pin to stop that moving (make sure it is sitting centrally in the cone). Now cut off the ends of the elastic so that it doesn't protrude past the outside of the cone (again so as not to jam the eyes). If you are following the suggestion of Susan Hambly then tie the elastic as tightly as possible onto the small button shank (super glue if required to be really safe) and feed the knot down into the cone hole. Nearly there. | 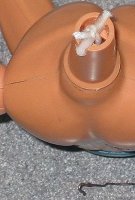 |
 |
Now again you dip the Action Man head
(this time without the inner cone present) into some hot water for about
30 seconds until it feels soft and then place it over the cone now fixed
on the body and push it firmly down. You will hear a
"click" as the softened head expands to allow the cone to click
into place.
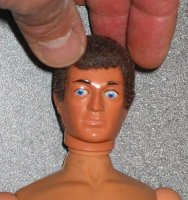
WELL DONE |
 |