Stage 1

CHANGING THE EYES IN A SOFT VINYL HEADED DOLL
When we had such a horribly long waiting list we got many requests to sell customers replacement vinyl eyes so they could fit them to their dolls themselves. We were so swamped with work that we were more than happy to help DIYers - however in the case of vinyl eyes I'm afraid we were not prepared to sell eyes for a couple of reasons:-
a) When we started changing them we found that you HAD to remove the eyes to find out what size was needed - measuring the front is a good guide but we often find that over-large eyes have been fitted which have stretched the thin bags that hold them and fitting eyes that are indicated by the front measurement can leave the eyes loose in the socket and sitting back in the head.
b) The eyeballs rotate on very small fragile plastic "pips" either side of the eyeball and these are easily broken (often by being poked by a rotten little brother!). A fair bit of force is required to insert the eyes and we destroyed many pairs of eyes initially before we learnt the technique - and it still occasionally happens even now.
We could see that if we supplied eyes to customers we would get a lot returned that were "damaged on arrival" - if you know what I mean! If you really want to try changing them yourself then they can be purchased from www.dollspart.com
Direct link - www.dollspart.com/spgm.cfm?dpt=H&srch=KW&item=3011
We are happy to pass on how we change them - see the instructions below.
Please read these instructions carefully BEFORE you start work and make sure you understand the process – you do NOT have time to follow these instructions while you are working – you have to work carefully BUT FAST once you have a heated head.
|
Stage 1 |
|
| Measure the eyeholes of the doll from the left to right corner. The best thing to use is a pair of dividers, or you can use a tape-measure. Measure the eyes in millimetres. This will give you an idea of the size of eye you need. You will often find that the actual sizes of a doll’s eyeholes will not be the same so obviously choose eyes that fit the largest eyehole. |  |
| The aperture across the new eye must not be smaller than the doll’s eyehole or you will see the eye-case when it is fitted. All these eyes (apart from the 15mm on the right) have the same width aperture of 14mm but, as you can see, the actual size of the whole casing varies greatly. | 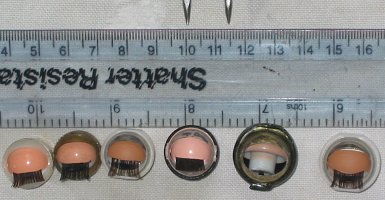 |
|
Stage 2 |
|
| Remove head from body. Sometimes it is easy to gently ease them apart, sometimes running the neck under hot water helps the process. | 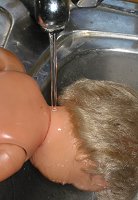 |
| If it is still a bit difficult to get off then you can use the smooth rounded end of a small spoon to lever it off while it is hot. | 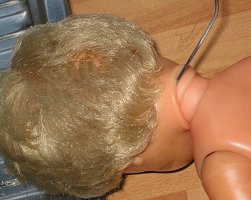 |
|
Stage 3 |
|
| Removing the old eyes. Heat a large saucepan of water – not boiling – but hot. Hold the doll’s head by the hair or back of the head and carefully immerse the face and inside of the face in the hot water. Leave for about 20 seconds then take out of the water and press the face to see if it has softened. If not, repeat for longer. | 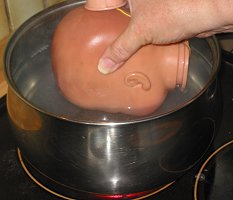 |
|
Stage 4 |
|
| With an old towel on your work surface to work on, remove the old eyes. Do this by putting your thumb on the back of the eye-sack (inside the head) of each eye in turn and push the eyes out of the front of the head. | 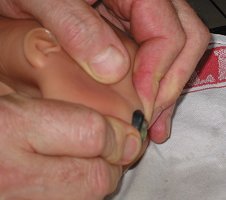 |
| This will take a fair bit of force, however if it seems the plastic is not soft enough then re-heat the head. If you push the eyes when the head is not soft and supple enough you run the risk of splitting the eye socket. | 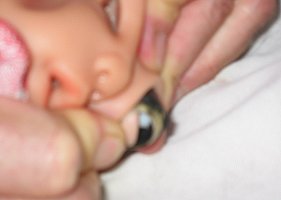 |
|
Stage 5 |
|
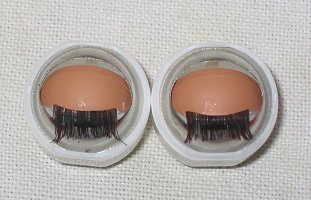
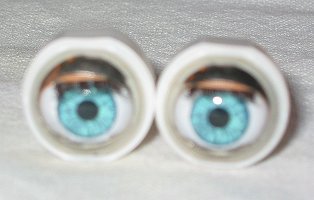
| Over the years the eye bag has stretched to fit the eye unit.
Now you have to select the best sized new eye thinking about the width of the eye opening but also the overall case size.
If you use too large an eye package the front eyehole will be stretched and the doll will have a wide-eyed startled
look.
If you use too small an eye package then the eyes will not fit tightly against the front of the face, showing the case and also allowing the whole eye package to move around – which is why you should NEVER cut the back of the eye bag to fit eyes – DESPITE what some web-sites will tell you. With cut bags the eyes will sit some way back from the front surface of the eyehole and show the eye-case because they are not tightly held. |
  |
|
Stage 6 |
|
| Assemble your operating tools. The new eyes, a towel to rest on (and use to cover the wet hair while you are working if it is too hot) and a small spoon with a smooth rounded end. |  |
| Remember that you need to work fast to get both eyes at least into their sockets before the head cools down too much. If you only get one in and then have to re-heat the head you run the risk of fogging the new eye already inserted. If you MUST re-heat the head between the eye insertions then try and ONLY get the hot water over the empty socket (hold the head to one side). Heat the head as before in the hot water. | |
|
Stage 7 |
|
| Hold the eye (by its sides – don’t touch the eyeball or eyelid or you will break the small plastic pips it pivots on) on the eyehole with the eyeball roughly horizontal but looking UPWARDS as if to try and “hook” the top of the eye package under the top of the eye opening.
Put your finger in the head so you can push the bottom of the eyelid outwards as you push the new eye
inwards.
Now press hard (ONLY on the sides of the eye package) down into the head and also rotate the eye package DOWNWARDS so that it rolls into the eyehole. |
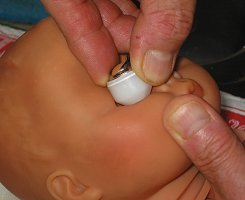 |
| You are only trying to get it half way into the eyehole (all around the eye package). | 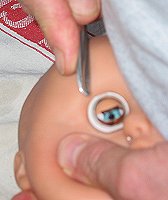 |
| Then push it fully in by pressing on the plastic lip (that is normally around the eye-package) with the end of the small spoon. Once it is in the eye socket don’t fiddle with it – get the other eye in using the same method. | 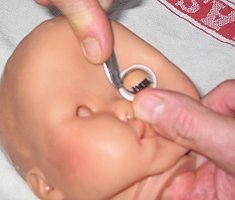 |
| If the eye package is a smooth ball with no lip then once you get the eye half in you can push it all the way in with a suitable socket from a socket set. (Find this BEFOREHAND). | 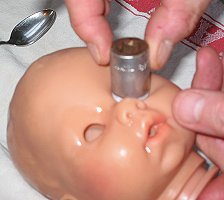 |
|
Stage 8 |
|
| As soon as both eyes are in (with the head still hot) you will need to move each eye package up and down so that it sits centrally in the eyehole. You do this by inserting the smooth rounded end of the spoon inside the eyehole but OUTSIDE of the eye package (i.e. between the two) and pressing on the plastic lip around the eye package (left and right, up and down) until you get it central. | 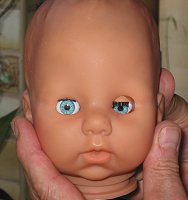 |
| Moving the eye up and down, side to side will not ROTATE the eye reliably (required if the eyelid is not straight – it is a matter of preference at what angle you set the eyelids but remember you need to get the eyelash sitting uniformly on the area under the eyebrow). | 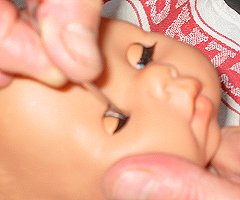 |
| To ROTATE the eyeball you again gently insert the end of the small spoon inside the eyehole but outside of the eye package and rotate the end of the spoon AROUND the eye package (between it and the eye bag) IN THE OPPOSITE DIRECTION that you want the eye to turn (if you stretch and pull the eye-bag around to the LEFT then the eye package will move to the RIGHT). |  |
| You need to do BOTH processes (straighten and rotate) together, because one will affect the other – you get one right and it can destroy the first setting – it needs patience BUT YOU NEED TO WORK FAST so you get time to do both eyes before the head cools down. Take care or you will split the eyehole or bag. | 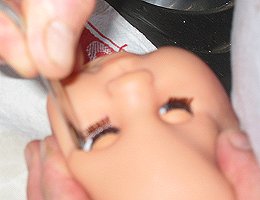 |
| IF you run out of time and the head cools down enough to make this work difficult then you can put hot water INSIDE the head (by filling from the back of the head) and then roll the head around to get the hot water on the back of the face and the eye bags.
Leave for about 20 seconds to heat the area and then empty the water out and continue.
DO NOT get the hot water onto the front of the eye as this may fog it – we’ve slipped and got away with it before so it depends on the eye – better to not risk
it.
When positioning the eye you want to ensure that you cannot see the metal or plastic case around the edge of the eye. If this is a problem try squeezing the face around the eyeball so as to push the eye back into the head (don’t overdo this, you may split the bag). Also you don’t want either the eyeball fouling on the bottom of the eye-hole or the eyelid fouling the top of the eyehole or the eye will be sticky and not rotate easily. |
|
| You need to end up with the eyelids either horizontal or at a similar (but opposite) angle depending on your preference and more importantly the doll. Hold the head upside down to check the eyelid alignment. | 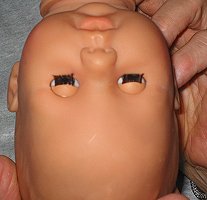 |
| Remember that the eyelash of each eye needs to sit flat on the area above the eyehole and under the eyebrow. Often the top surfaces of the eyeholes will not have the same curvature and in this picture the eye on the right does not open completely because the eyelashes are hitting the eyehole at each end. There is little you can do about this and such differences give the doll character and add realism. | 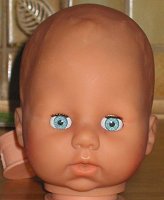 |
|
Stage 9 |
|
Once
you are absolutely sure the eyes are correctly lined up, looking forwards
and opening and closing perfectly then put the head back onto the body.
You may have to heat the neck of the body or the neck of the head
to make this easier. Check
the eyes again once you’ve put the head on. |